Anchoring Techniques: What I’ve Learned
Securing your rigid inflatable boat (RIB) properly is crucial for a safe and enjoyable boating experience.
Here are some effective manual anchoring techniques. It’s best to practice these methods beforehand.
This ensures you’re prepared when you need to anchor during your trip. It is especially important when passengers are on board.
Below, I’ve compiled 11 key practices from my own experience of anchoring techniques to help you anchor safely.
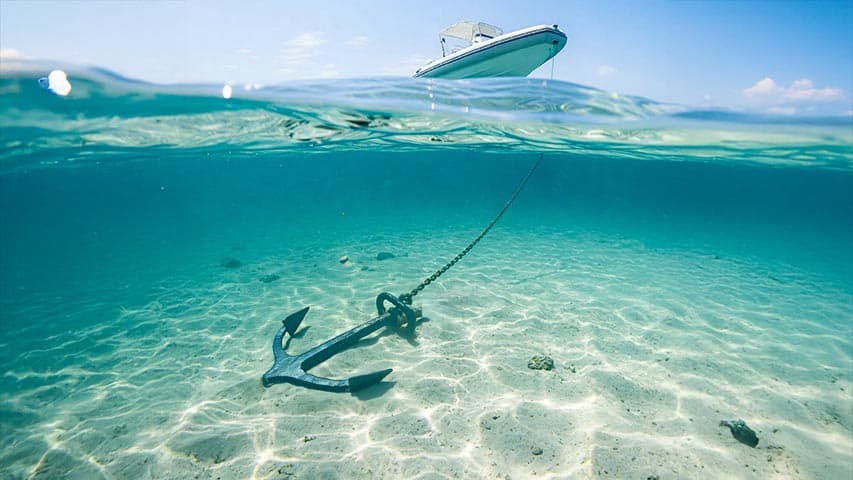
1. Choose the Right Anchor
Select an anchor that fits the size and weight of your RIB. Consider the bottom conditions in your boating area.
There are a lot of anchor types to choose from. Danforth-style anchors are popular choices for their holding power and versatility.
2. Find a Suitable Anchorage
Choose a sheltered anchorage with good holding ground and protection from wind, waves, and currents.
Avoid anchoring in areas with many underwater obstacles or hazards like power lines, telecom cables … It’s marked on the nautical maps.
3. Prepare the Anchor Gear
Attach the anchor to the anchor line using a strong shackle or swivel.
Ensure that the anchor line is properly sized and secured to the bow cleat or anchor roller.
The length of an anchor line depends on the water depth and the conditions in which you are anchoring.
A general guideline is:
Harsh conditions (strong wind, current, or waves): 7 to 10 times the water depth.
Calm conditions (little wind and current): 3 to 5 times the water depth.
Normal conditions: 5 to 7 times the water depth.
Remember that a chain is preferred over just a rope.
4. Approach the Anchorage
Approach the anchorage slowly and carefully, taking into account wind and current conditions.
Use caution to avoid dragging the anchor or tangling the anchor line.
5. Deploy the Anchor
Once in position, lower the anchor calmly over the bow of the RIB. Pay out the anchor line slowly. No need to throw it. Allow the anchor to settle on the bottom before securing the anchor line to the cleat.
6. Set the Anchor
Once the anchor is down on the seafloor, gently apply reverse throttle to set the anchor firmly in the bottom.
Monitor the anchor line for any signs of dragging or movement.
7. Check Holding
After setting the anchor, observe the surrounding landmarks or monitor the GPS position. Make sure the RIB is holding its position securely. Check this many times.
8. The Use of Multiple Anchors
In areas with strong currents, use multiple anchors to provide additional holding power. This also adds stability.
Configure both anchors in a kind of a Y or a bow and stern one. The video below shows you how to achieve it.
9. Monitor Weather Conditions
Keep an eye on weather forecasts. Be prepared to reposition the anchor if conditions deteriorate. Retrieve it if necessary.
10. Retrieve the Anchor Carefully
When it’s time to retrieve the anchor, approach it slowly. Do this carefully to avoid tangling the anchor line. This will also prevent damage to the anchor gear.
Use a steady pull to break the anchor free from the bottom. It could be that the anchor does not come loose right away. In that case make a half circle and then throttle easy backwards no crossing the anchor line.
11. Stow Anchor Properly
After retrieving the anchor, rinse it thoroughly with freshwater to remove any salt or debris. Stow it securely in the anchor locker or storage compartment to prevent damage or injury.
By following these anchoring techniques, you ensure secure use of the anchoring technique. This allows you to relax and enjoy your time on the water without worry.
This video showcases how to anchor in different situations.
Interested in more of of these kind of posts? Here they are: Videos and posts on how-to

